Hello and welcome to my tutorial. I made this one at Krigls request. He asked how one can make a cut out object, such as a plane, blend in with the background. I used photoshop CS2 for this tutorial, but I think you can do this with any respectable image editing program.

First of, you need to take a close look at the lighting in the background. It's very important to get the angle right. It's easier to take a screenshot that matches the lighting of the background than completely altering the background to match the lighting of your plane.
Second, you need a clean cut out of the plane. I always use the pen tool to make selections and I recommend it to everybody, because it has anti aliassing and can do nice curves. It is also a lot quicker than any other method if you practise a bit. (The only thing that is quicker is the magic wand tool, but we all know that it sucks

) Anyway, you need to make sure it's just the plane and not parts of the sky/scenery in your cut out and also try to minimize the jaggies.
Allright, now you're ready for the photoshopping!

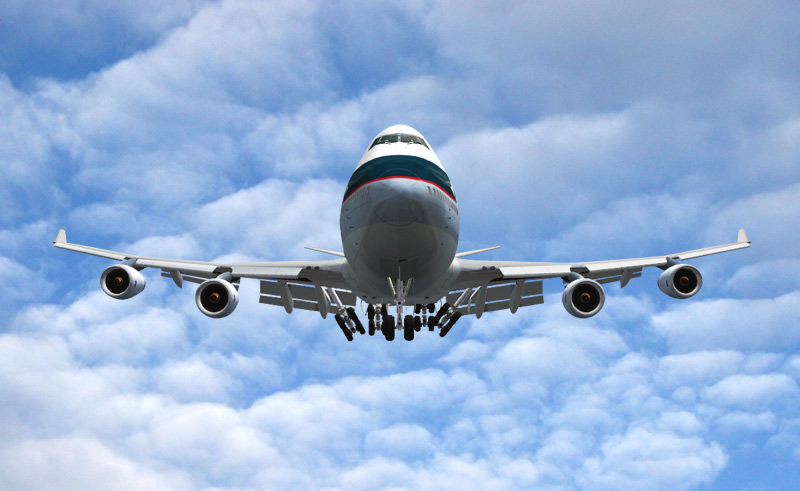
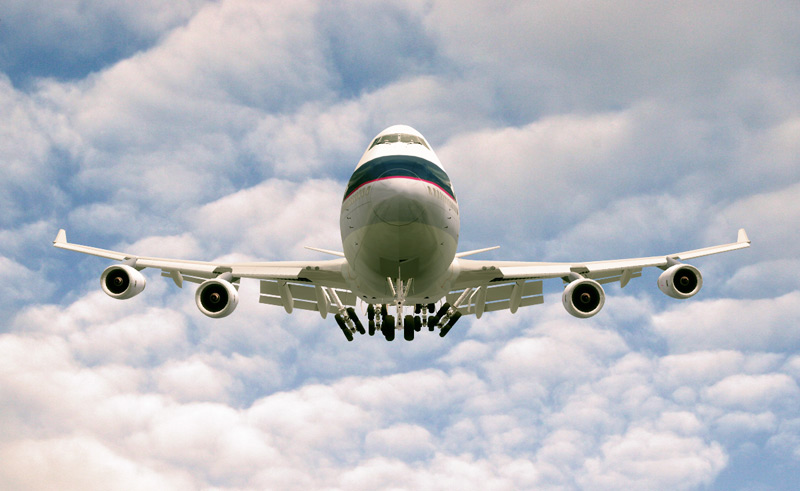
I'm just quickly throwing this together, so don't expect a very cool pic. I had this pic of a nice sky and a 747 taking off on my computer and I used them. The picture that I got out of the two really isn't logical. I just needed some stuff to throw together tough and it doesn't really matter for the techniques we will be using.
So here is what I started with:

And here it is after the blending:

And here is how to do it:
Select the layer of the plane and adjust the levels (CTRL + L). (You can also try auto adjust levels (CTRL + SHIFT + L) or auto adjust colours (CTRL + SHIFT + B). I like to do it myself though...

)
http://i143.photobucket.com/albums/r144/VX_StonedPigeon/blend03.jpgA very good friend of mine (and now your too) is the 'fade' option. Here is how it works: right after you've made a change to the pic, go to 'edit' and then 'fade'. Now you can modify the amount of the change and the blending mode. It's great! And it works with almost everything you do!
http://i143.photobucket.com/albums/r144/VX_StonedPigeon/blend04.jpghttp://i143.photobucket.com/albums/r144/VX_StonedPigeon/blend05.jpgSo what if you don't like how the colours match? You can simply paint over the plane with a brush set to any blending mode you like (I'd use colour in this case

). You just need to click a tiny button before doing so.
http://i143.photobucket.com/albums/r144/VX_StonedPigeon/blend06.jpgYou can also change the colour of the whole picture a bit. This is good for blending in the plane. It's easy too. Just make a new layer (CTRL + SHIFT + N) and fill it with any colour you want, maybe even a gradient. Then play around with the opacity and blending mode.
http://i143.photobucket.com/albums/r144/VX_StonedPigeon/blend07.jpgWhen you think you've done enough to make the seperate layers match as good as possible, it's time to work on the entire picture. You can't do that, unless it is in one layer. Just click here to do it.
http://i143.photobucket.com/albums/r144/VX_StonedPigeon/blend08.jpgA little diffusive glow always helps to put things together. Again, the fade option is your best friend.
 http://i143.photobucket.com/albums/r144/VX_StonedPigeon/blend09.jpghttp://i143.photobucket.com/albums/r144/VX_StonedPigeon/blend10.jpghttp://i143.photobucket.com/albums/r144/VX_StonedPigeon/blend11.jpg
To give the shot's colours a bit more 'depth' you could try this technique: I thought the pic was a bit too bright, so I used a brush set to colour burn and painted over the entire picture with a green colour. Why green? Because it doesn't match the pic at all. Don't worry, it will turn out nice and give more depth to the colours.
 http://i143.photobucket.com/albums/r144/VX_StonedPigeon/blend12.jpg
The last thing to do is to add a photo filter:
http://i143.photobucket.com/albums/r144/VX_StonedPigeon/blend13.jpgAfter applying the filter you like you can play with it by using the fade option. Try different blending modes and opacities until you like it.
For more tricks, check out my moody pics workshop by clicking my signature.
So, this is how I did this quick composite. It needs to be said though, that there is no standard way to do composites. Everyone is different and this tutorial was ment to give you a general idea on how to do it. The best way to learn it is to do it. I learnt this all by messing around with photoshop. To make good composites you need two things: experience and 'know-how'. Know-how for the photoshop techniques and experience for a nice picture, to know what works and what doesn't...

Thanks for reading my tutorial. I appreciate any kind of feedback on it and if you have any questions, please feel free to ask.

Happy editing!
Sytse
Finally, Krigl; I have included a pic to show you the location of the dodge and burn tools:
http://i143.photobucket.com/albums/r144/VX_StonedPigeon/blend01.jpgThe first is the dodge, the second is the burn.
I almost never use them though. I like to grab a brush set to colour dodge (or burn).
http://i143.photobucket.com/albums/r144/VX_StonedPigeon/blend02.jpgHope this all helps you mate!

Cheers,
Sytse

