Disclaimer - intended for FS8/9, should display in FSX but is not in the optimized format.
Working on creating a proper repaint for my project, I learned some helpful ways to do it properly on this forum. Among these was Wji's helpful suggestion to use freeware Pixia, which has permitted creating decent-looking panel lines and effects. One of the things that I also discovered was how to create a reflective area without having to use a separate part with reflective texture. This may be old news to some, but for anyone new to repainting and wanting to achieve similar results, this might be helpful.
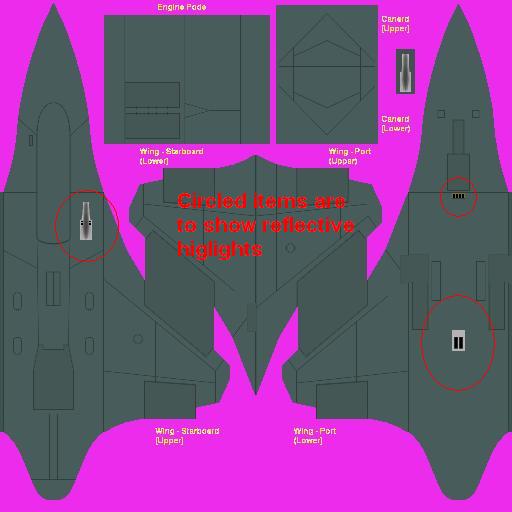
Say you want to create a bare-metal gun panel, APU exhaust, and vents on a matt-painted fuselage. Using your paint editor, colour in the panels using a medium-grey shade (pic-1).

This will serve to represent the "metal" colour proper. Copy the entire image and then colour in only the areas you want reflective (e.g., the panels you just repainted) in a lighter shade of grey; the darker the grey, the more reflective it will be. Still working with your copied image, erase all remaining areas of the repaint. Leaving them true white will result in no alpha being applied. The holes representing vents in the gun/APU have been painted true white, so as to not display any reflection. For a satin effect you can repaint the entire area in a very light shade of grey. I haven't included what shades to use as it depends on personal preference to achieve the effect you want, so some experiementation is in order. This will become your Alpha Channel (pic-2).

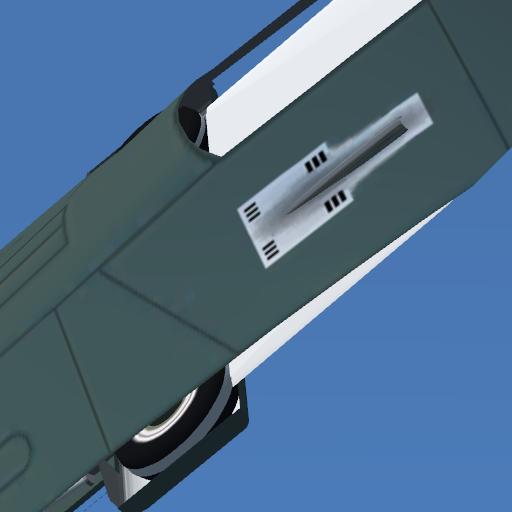
Next, open up your main image (pic-1) in Dxtbmp. Click "Alpha" and then "Import Alpha Channel". You will see a message indicating that the currrent alpha channel will be replaced. Click OK and then navigate to where your Alpha Channel (pic-2) is. In the preview window at top-right of the screen, this image will be displayed. Click on "Alpha" then "Apply Alpha to Image". Save in DXT3 format. That's it - you now have reflective highlights on your aircraft (pic-3, 4).


