Post by rottydaddy on Mar 11th, 2007 at 9:12pm
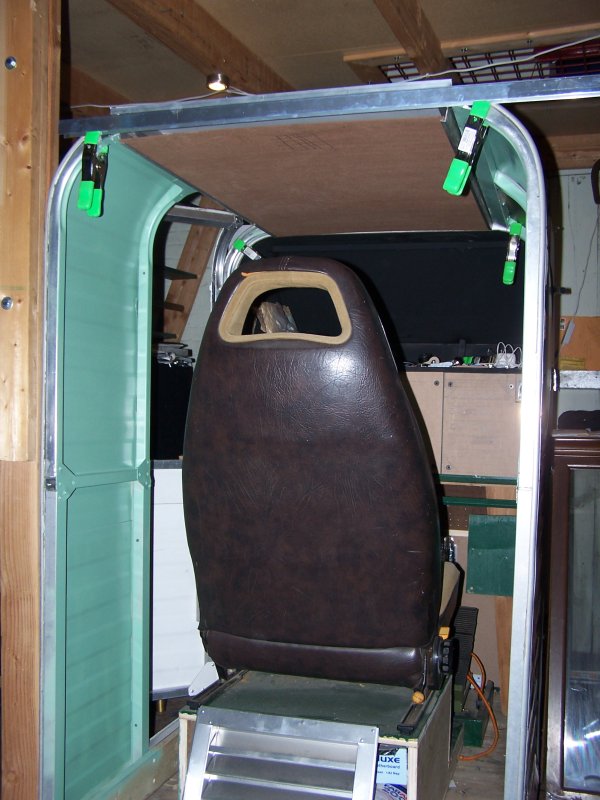
Tons of progress since I got back from Tampa... finally riveted up the right side of the shell, with window, paint, etc. Not perfect, but I may be able to tart up the funky edges later. Tried using draw hasps to hold it in place, but I think I will have to thru-bolt everything. Note the trim strip... they came from the truck cap; neatly solves the problem of finishing the front and back edges of the shell. and the rear wall will slip under the lip of the trim strip... very cool. There's even a rubber bumper that fits into the channel of the strip- that will go back in later.
Also started the roof section today ... aluminum sheet on top, with a Masonite headliner (which will have vents and a light of some kind). the "aft bulkhead" will just be 1/4" Masonite fromed with 1X2 pine and clad with aluminum... I'm down to just little bits &pieces of square tube now, and not keen on wasting a lot of time riveting that all together when it won't really be seen.
there will be an access panel of some kind in the back, and maybe a small hatch near the top for viewing ("he looks so natural") or even a webcam at some point.
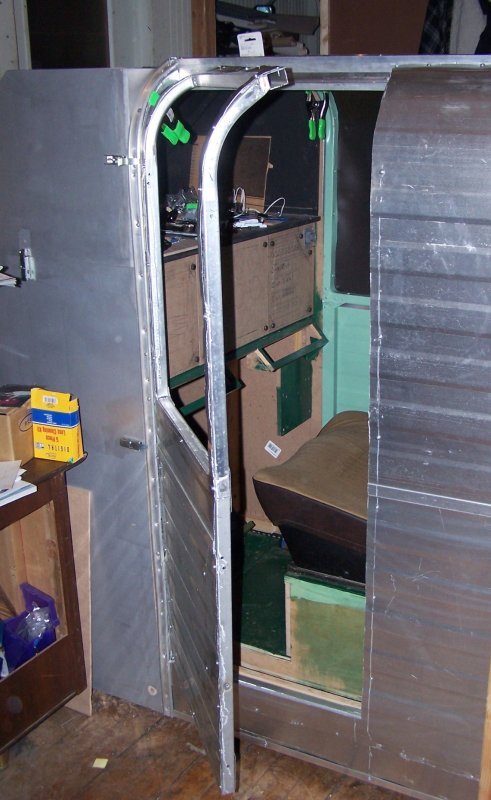
The door is cut out and mocked up now... some serious problems cutting that out with a follow-bit on the Dremel... I may have to go with a wider gap so I can clean it up. That skin is just tacked in place now... I have to paint the inside, attach the plastic, then rivet the skin on... in place, I think... I really should complete the shell and make sure everything fits before doing that, because I'm already in a little trouble fitting the right side. I had to cut a little radius out of the top corner of the door so it would swing... good thing I thought of that beforehand- LOL!
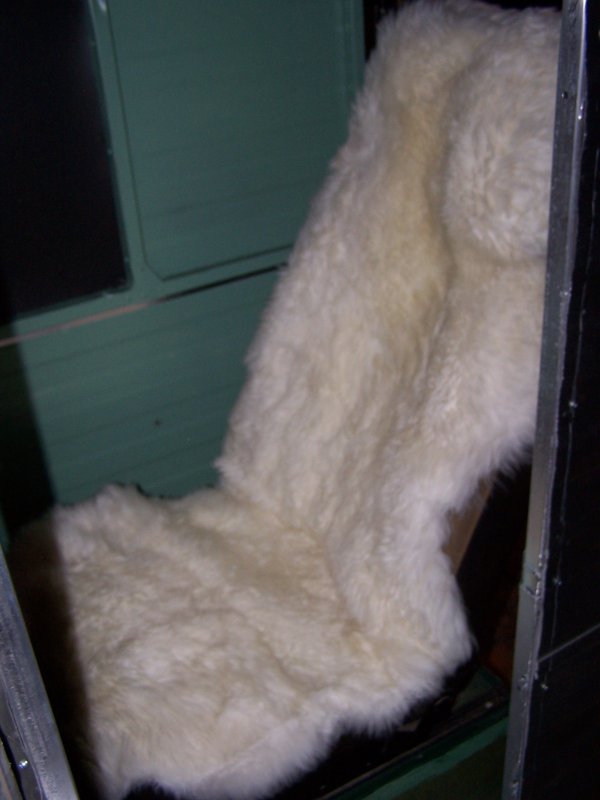
Found some $20 sheepskins at Ikea...not bad at all... oh man, once I fit these to the seat with some Bungees, it's going to be one cushy "ride"... about 1/10th the cost of buying pre-made sheepskin seat covers.
Just had to lay 'em in there to check it out... mmmm... wooly. ;D
Once I finish the shell, I'll remove all of it and get to finishing the interior structure...
Then it's time to add switches, wiring harness, etc.
And oh, yes, I guess i need to finish building the computer, and interface it somehow with this thing... almost forgot. ;D
I'm currently building a website about the pit and some other stuff... stay tuned...

Also started the roof section today ... aluminum sheet on top, with a Masonite headliner (which will have vents and a light of some kind). the "aft bulkhead" will just be 1/4" Masonite fromed with 1X2 pine and clad with aluminum... I'm down to just little bits &pieces of square tube now, and not keen on wasting a lot of time riveting that all together when it won't really be seen.
there will be an access panel of some kind in the back, and maybe a small hatch near the top for viewing ("he looks so natural") or even a webcam at some point.
The door is cut out and mocked up now... some serious problems cutting that out with a follow-bit on the Dremel... I may have to go with a wider gap so I can clean it up. That skin is just tacked in place now... I have to paint the inside, attach the plastic, then rivet the skin on... in place, I think... I really should complete the shell and make sure everything fits before doing that, because I'm already in a little trouble fitting the right side. I had to cut a little radius out of the top corner of the door so it would swing... good thing I thought of that beforehand- LOL!
Found some $20 sheepskins at Ikea...not bad at all... oh man, once I fit these to the seat with some Bungees, it's going to be one cushy "ride"... about 1/10th the cost of buying pre-made sheepskin seat covers.
Just had to lay 'em in there to check it out... mmmm... wooly. ;D
Once I finish the shell, I'll remove all of it and get to finishing the interior structure...
Then it's time to add switches, wiring harness, etc.
And oh, yes, I guess i need to finish building the computer, and interface it somehow with this thing... almost forgot. ;D
I'm currently building a website about the pit and some other stuff... stay tuned...