Post by JBaymore on Jul 30th, 2005 at 6:44pm
Glareshield Night Lighting
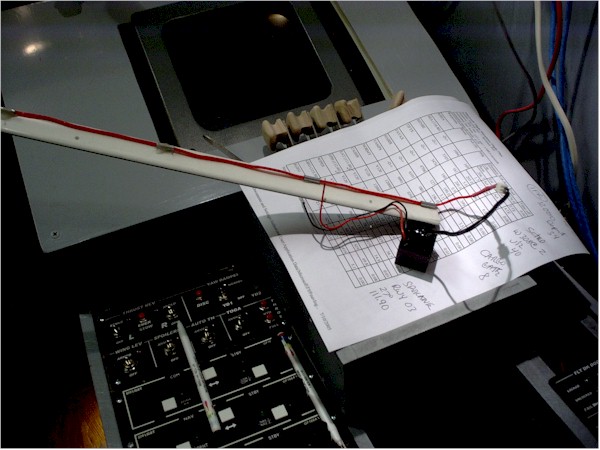
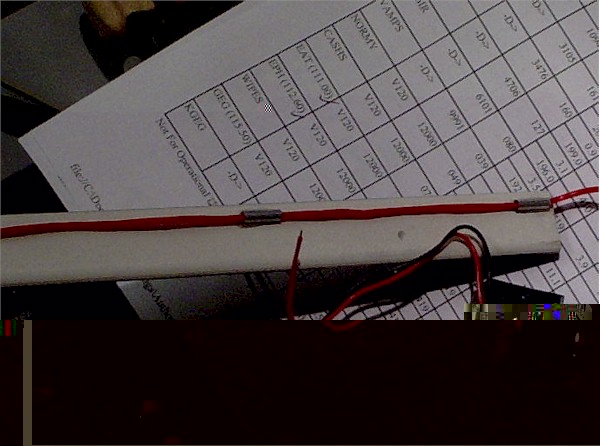
I mentioned in the last part (21) that I had added the light to the glareshield. In the two images below you are looking at the BACK of the trim piece that faces the top edge of the glareshield.
On the back of it I have glued a number of short pieces (1/2" +/-) of hollow aluminum tubing using 5 minute epoxy in a line along what will be the bottom edge. A piece of electroluminescnet red "string" is threaded thru the hollow "mounts" , and the 12v inverter is mounted inside the glareshield. The inverter is the small cubic "box" that you see.
Result...... non-heat generating, red light on the glareshield controls.
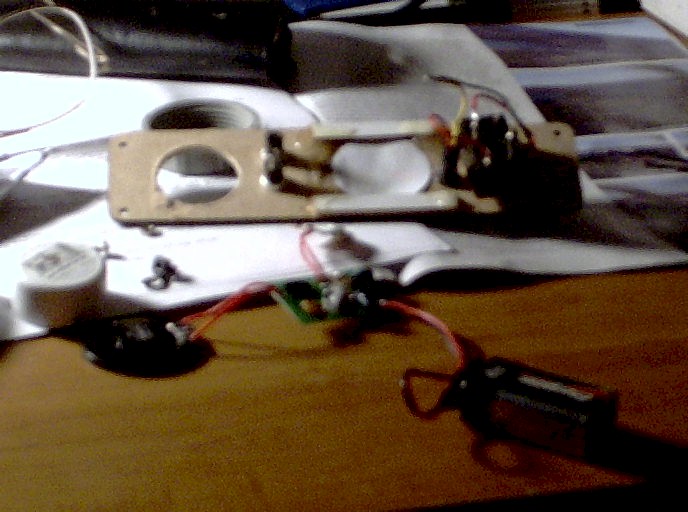
Internal Representation of the Beacon and Strobe Lights
I wanted to have the red beacon light to "reflect" just a tiny bit into the cockpit. Also the strobe light. So I used the pictured red led flasher unit from Radio Shack to accomplish this task.
The units are powered by 3 VDC via a battery pack. They have a red normal LED mounted on a tiny circuit board that has the encapsulated flasher circuit. I cut the battery packs off and used a 3 VDC power supply line in the pit and wired it to the SECOND set of contacts on the "Beacon" light switch.
The flashing LED is mounted above the overhead panel out of the line of sight from the pilot's seat... but it puts just a very subtle red "reflection" onto the window frame. Ditto for the "Strobe" switch and the LED..... but it is in a slightly different position....more in the center of the windscreen.
For the strobe, I needed WHITE light, of course, not red. What to do? Since the flashing circuit is external to the LED in these units (yes!), I just unsoldered the standard red LED from the circuit board and put a 1100MCD white one in it's place. Bingo..... white flashing LED.
On the "Beacon" switch I actually have THREE of the LEDs. Two of them create "reflections" in the cockpit...... with the staggeered and varying timing that is typical of the real thing.
The third one is a "dumb" idea. It is mounted on the top of the simpit enclosure...... and shows out in the room that the engines are running ;D. OK... dumb, I know.
best,
...................john
I mentioned in the last part (21) that I had added the light to the glareshield. In the two images below you are looking at the BACK of the trim piece that faces the top edge of the glareshield.
On the back of it I have glued a number of short pieces (1/2" +/-) of hollow aluminum tubing using 5 minute epoxy in a line along what will be the bottom edge. A piece of electroluminescnet red "string" is threaded thru the hollow "mounts" , and the 12v inverter is mounted inside the glareshield. The inverter is the small cubic "box" that you see.
Result...... non-heat generating, red light on the glareshield controls.
Internal Representation of the Beacon and Strobe Lights
I wanted to have the red beacon light to "reflect" just a tiny bit into the cockpit. Also the strobe light. So I used the pictured red led flasher unit from Radio Shack to accomplish this task.
The units are powered by 3 VDC via a battery pack. They have a red normal LED mounted on a tiny circuit board that has the encapsulated flasher circuit. I cut the battery packs off and used a 3 VDC power supply line in the pit and wired it to the SECOND set of contacts on the "Beacon" light switch.
The flashing LED is mounted above the overhead panel out of the line of sight from the pilot's seat... but it puts just a very subtle red "reflection" onto the window frame. Ditto for the "Strobe" switch and the LED..... but it is in a slightly different position....more in the center of the windscreen.
For the strobe, I needed WHITE light, of course, not red. What to do? Since the flashing circuit is external to the LED in these units (yes!), I just unsoldered the standard red LED from the circuit board and put a 1100MCD white one in it's place. Bingo..... white flashing LED.
On the "Beacon" switch I actually have THREE of the LEDs. Two of them create "reflections" in the cockpit...... with the staggeered and varying timing that is typical of the real thing.
The third one is a "dumb" idea. It is mounted on the top of the simpit enclosure...... and shows out in the room that the engines are running ;D. OK... dumb, I know.
best,
...................john