Post by JBaymore on Jul 6th, 2005 at 8:28pm
Installing the Gear Lever
Got a little behind in posting what has been happening . Catching things up a bit closer here to where the cockpit is at this time........
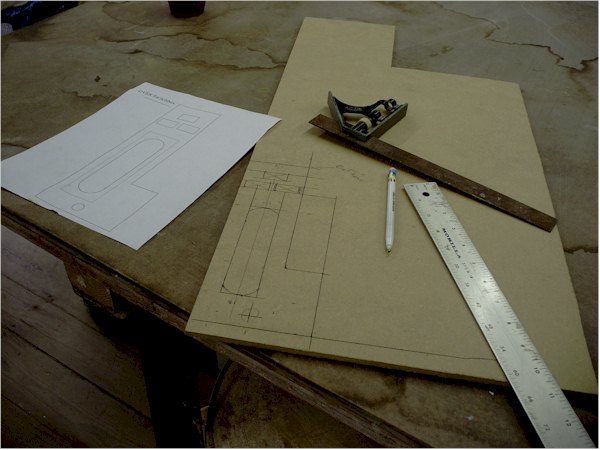
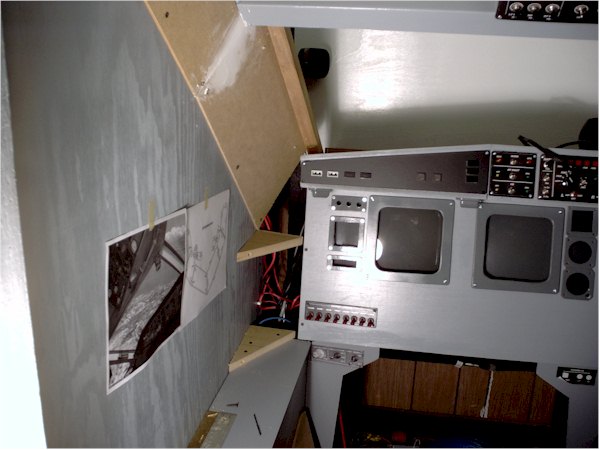
In photos #1 and #2 you can see the 1/4" MDF panel facing that will cover the front of the gear switch. The design drawing is to the left of the wood. This panel utilizes three of the Flight Deck Solutions annunciators for the gear position indicators at the top. Each will have a green and a red LED in it. There will be an "over-ride" buttom at the lower right. And of course the printed details about speeds will be added.
In photo #3 below I have installed the gear control lever (construction shown in "Part 19") in the MIP right hand bay. Four screws thru simple holes in the aluminum frame hold it in place on a 1/2" MDF spacer board. The unit above it is the monitor switch ( 1 monitor - 2 computers) that will allow me to change the display on one of the captain's VDT's.
In photo #4 below, the MIP facing is in place and the gear panel is installed. When the panel was installed, a sheet of closed cell foam with a slit for the gear handle was added between the gear panel facing and the MIP facing. This is a nice "detail" that adds a finished touch to the installation.
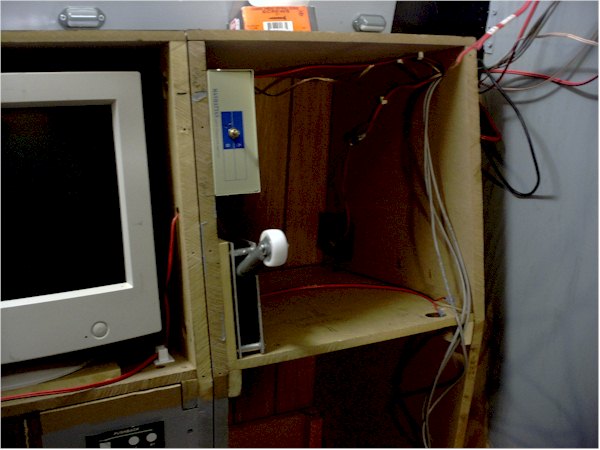
The black knob above the gear handle will change the right hand captain's VDT from the ND display to the EICAS display.
Photo #5 below pretty much shows the MIP area as it sits today. The bulk of the gross layout is now done on this area.
If you look closely you can see the MIP lights attached on the bottom of the glareshield. They are wired (12VDC) to the cockpit lighting switch panel located on the lower left of the MIP. They are spaced so as to not throw a glare on the VDT's. The one on the extreme left is angled toward the left so as to illuminate the angled panel area that will sit over there.
The glareshield area is pretty much populated with what it gets. It just needs to all be wired up. The last lighting detail there will be the panel lights for the Glareshield... which will likely be electroluminecent due to space constraints.
Getting Rid of "The Box"
One of the best ways to make a cockpit seem like a real plane is to get rid of the "square box" aspect of things. So in the two photos below you can see the start of taking all the right angles off the basic construction and the left framing side of the main windscreen. The panels are 1/4" MDF using "Struts" of 1/2" MDF to form the angles. Holes for wiring are deilled in the backing struts. The white stuff in the last photo is spackle.
If you look closely, you can also see the left front speaker of the 6 speaker 5.1 surround sound system.
More as it develops.
best,
........................john
Got a little behind in posting what has been happening . Catching things up a bit closer here to where the cockpit is at this time........
In photos #1 and #2 you can see the 1/4" MDF panel facing that will cover the front of the gear switch. The design drawing is to the left of the wood. This panel utilizes three of the Flight Deck Solutions annunciators for the gear position indicators at the top. Each will have a green and a red LED in it. There will be an "over-ride" buttom at the lower right. And of course the printed details about speeds will be added.
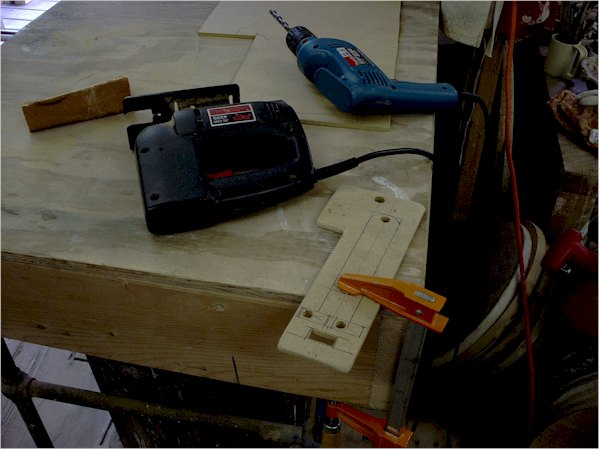
In photo #3 below I have installed the gear control lever (construction shown in "Part 19") in the MIP right hand bay. Four screws thru simple holes in the aluminum frame hold it in place on a 1/2" MDF spacer board. The unit above it is the monitor switch ( 1 monitor - 2 computers) that will allow me to change the display on one of the captain's VDT's.
In photo #4 below, the MIP facing is in place and the gear panel is installed. When the panel was installed, a sheet of closed cell foam with a slit for the gear handle was added between the gear panel facing and the MIP facing. This is a nice "detail" that adds a finished touch to the installation.
The black knob above the gear handle will change the right hand captain's VDT from the ND display to the EICAS display.
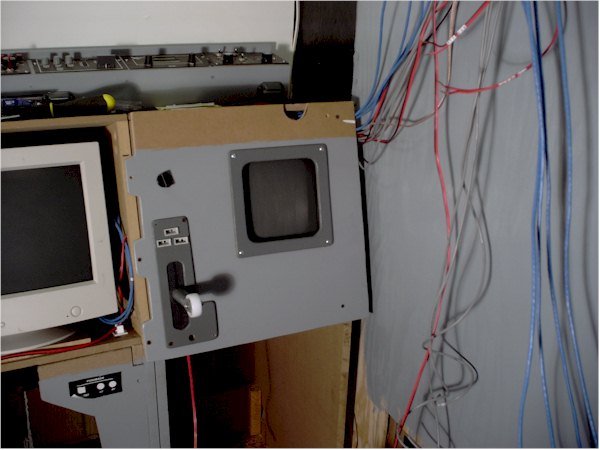
Photo #5 below pretty much shows the MIP area as it sits today. The bulk of the gross layout is now done on this area.
If you look closely you can see the MIP lights attached on the bottom of the glareshield. They are wired (12VDC) to the cockpit lighting switch panel located on the lower left of the MIP. They are spaced so as to not throw a glare on the VDT's. The one on the extreme left is angled toward the left so as to illuminate the angled panel area that will sit over there.
The glareshield area is pretty much populated with what it gets. It just needs to all be wired up. The last lighting detail there will be the panel lights for the Glareshield... which will likely be electroluminecent due to space constraints.

Getting Rid of "The Box"
One of the best ways to make a cockpit seem like a real plane is to get rid of the "square box" aspect of things. So in the two photos below you can see the start of taking all the right angles off the basic construction and the left framing side of the main windscreen. The panels are 1/4" MDF using "Struts" of 1/2" MDF to form the angles. Holes for wiring are deilled in the backing struts. The white stuff in the last photo is spackle.
If you look closely, you can also see the left front speaker of the 6 speaker 5.1 surround sound system.

More as it develops.
best,
........................john