Post by JBaymore on Nov 15th, 2003 at 2:46pm
Well...... I got a little bit more done on my homebuilt cockpit main structure. I am very glad that from the outset that I looked at this as a long term project....... because it is very time consuming to bring all the elements together.
Please see the other thread in this fourm...... "Cockpit Main Support Construction (repost)" for the documentation of the construction project that has happened before these pictures were taken. It has details that I do not cover here.
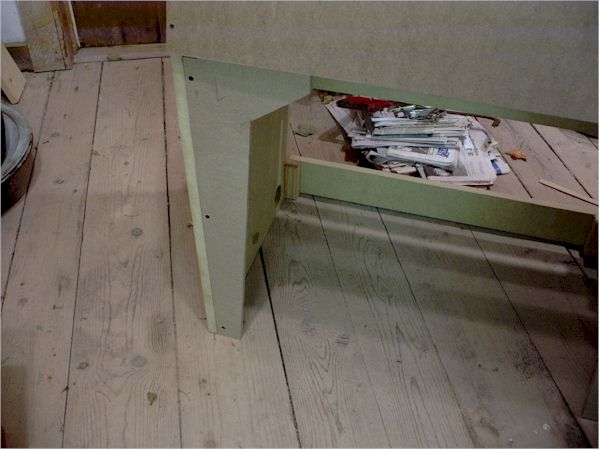
In Photo #1 and #2 below, you can see the construction of the support base upon which all of the cockpit elements will sit. It is framed and supported with 2" x 3" pine and a 5/8" waferboard surface. It is simply screwed together....with no gluing of the joints. This surface will be completely covered with floor covering of one sort or another or be hidden under the cockpit panel structures. This base will also serve as the "attachemnt" for the lower enclosure walls that will contain the cockpit.
Photo #1
Photo #2
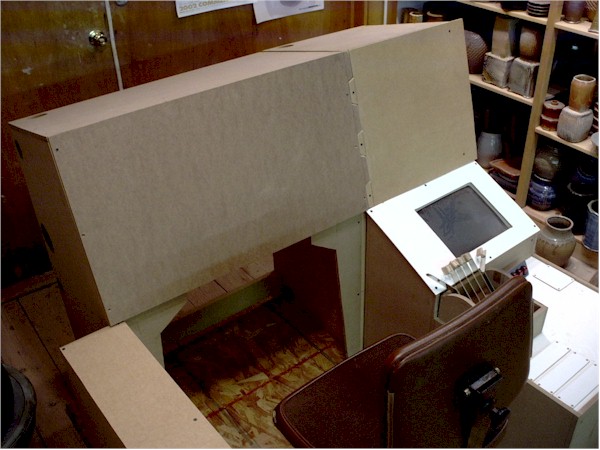
Here below in #3 is a shot showing the various shelf support elements just sort of sitting grouped together in their relative positions. I have added the first picece of the main panel facing on the shelf section that is located directly in front of the pilot. The facing is made out of 1/4" medium density fiberboard, and is screwed in place into countersunk holes. It will not be glued in place since it will go on and off repeatedly as electronics and other stuff is added and serviced. Holes will be cut to expose the monitors for the "glass cockpit" elements as well as any "control modules".
Photo #3
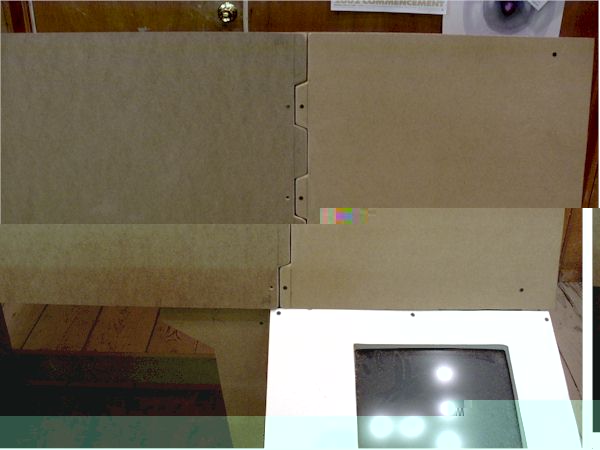
In photos #4 and #5 below, you can see the "detail" treatment of how the two main panel facing sections are joined together. I have seen this type of construction in numerous real cockpits......and I thought it added a nice touch of "realism" to the look of things. The intermeshing "teeth" on it's edge also will serve to lock two separate panel shelf units located behind it together into a single structure. Note that the panel edges are rounded with sandpaper to make them look more like the real aluminum panels.
Photo #4
Photo #5
In photo # 6 below you can see a close up of the "skirt" of 1/2" MDF added to the edge of the "footwell" that will house the rudder pedals. This facing gives the lower section more of a finished look and will also serve to mount some additional cockpit controls.
Photo #6
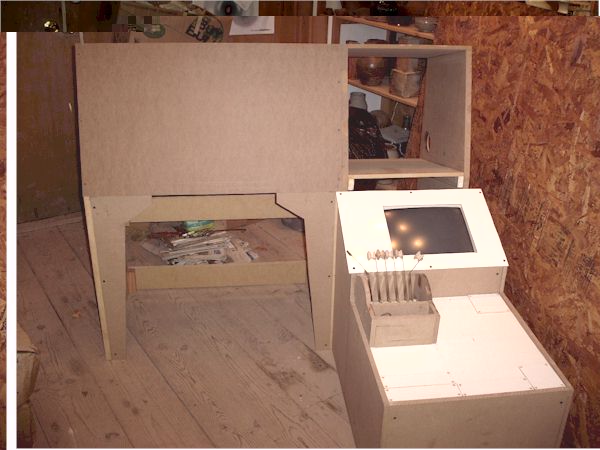
Here shown in #7 are the various cockpit modules so far. Modular is important to me....so that I can move it as needed. In this shot you can see that I have constructed the left sidestick area..... and unfortunately I missed taking any pictures of that construction. It is basically a box with a few wiring pass thru holes in it and is made the same way the other shelf units were.
This is now really starting to look more like a cockpit than a pile of book shelves ;). Next step here is to add the glareshield unit on the top.
Photo #7
The glareshield you see being started in #8 below is constructed of 1/2" MDF with small pine blocks to add structure and, like just about everything, is "screwed and glued". The panel facing is 1/4" MDF. This unit will eventually house the autopilot, ADF radio controls, some MFD controls, and some warning displays. It will not go the full depth of the shelf support back toward the "windscreen"..... since at least for a while...... display monitors will have to go there. (I do hope to eventually convert to a projected display.)
Photo #8
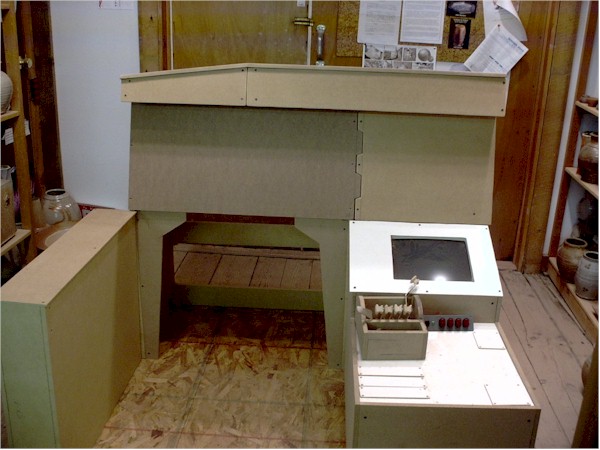
In #9 you can see the glareshield sections (it is split in two pieces) screwed in place on the main panel supports. This is held by a combination of gravity and three screws thru small pine blocks that insert into the main panel shelf units.
Photo #9
Photo #10 pretty much shows the state of my cockpit project structure as of this time. It is getting a bit exciting now. But I have to contain that excitement......... since there is still a long way to go before I will be flying in it.
Photo #10
I will have to check all the receipts for the materials that I have purchased for this main part of the construction......... but I am pretty positive that at this point it is still under $100 USD in materials. I originally estimated that the entire enclosed cockpit would cost less than $200 USD to construct. (I do have a decent assortment of hand woodworking tools already around the house.)
More to follow as it all develops.
best,
.....................john
Please see the other thread in this fourm...... "Cockpit Main Support Construction (repost)" for the documentation of the construction project that has happened before these pictures were taken. It has details that I do not cover here.
In Photo #1 and #2 below, you can see the construction of the support base upon which all of the cockpit elements will sit. It is framed and supported with 2" x 3" pine and a 5/8" waferboard surface. It is simply screwed together....with no gluing of the joints. This surface will be completely covered with floor covering of one sort or another or be hidden under the cockpit panel structures. This base will also serve as the "attachemnt" for the lower enclosure walls that will contain the cockpit.
Photo #1
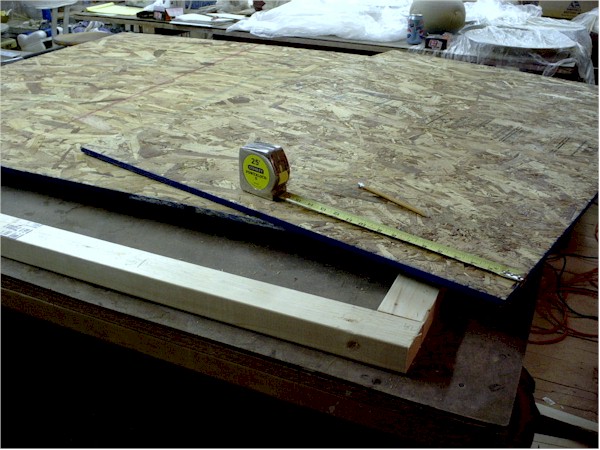
Photo #2

Here below in #3 is a shot showing the various shelf support elements just sort of sitting grouped together in their relative positions. I have added the first picece of the main panel facing on the shelf section that is located directly in front of the pilot. The facing is made out of 1/4" medium density fiberboard, and is screwed in place into countersunk holes. It will not be glued in place since it will go on and off repeatedly as electronics and other stuff is added and serviced. Holes will be cut to expose the monitors for the "glass cockpit" elements as well as any "control modules".
Photo #3
In photos #4 and #5 below, you can see the "detail" treatment of how the two main panel facing sections are joined together. I have seen this type of construction in numerous real cockpits......and I thought it added a nice touch of "realism" to the look of things. The intermeshing "teeth" on it's edge also will serve to lock two separate panel shelf units located behind it together into a single structure. Note that the panel edges are rounded with sandpaper to make them look more like the real aluminum panels.
Photo #4
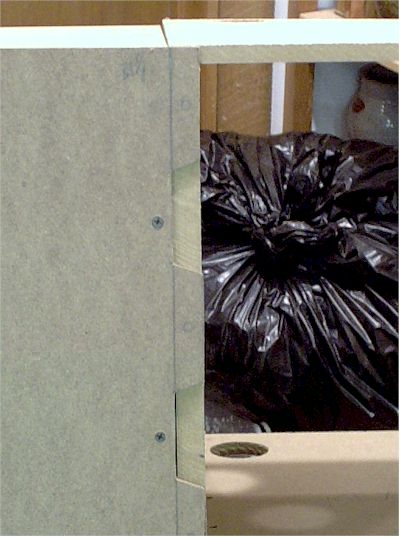
Photo #5
In photo # 6 below you can see a close up of the "skirt" of 1/2" MDF added to the edge of the "footwell" that will house the rudder pedals. This facing gives the lower section more of a finished look and will also serve to mount some additional cockpit controls.
Photo #6
Here shown in #7 are the various cockpit modules so far. Modular is important to me....so that I can move it as needed. In this shot you can see that I have constructed the left sidestick area..... and unfortunately I missed taking any pictures of that construction. It is basically a box with a few wiring pass thru holes in it and is made the same way the other shelf units were.
This is now really starting to look more like a cockpit than a pile of book shelves ;). Next step here is to add the glareshield unit on the top.
Photo #7
The glareshield you see being started in #8 below is constructed of 1/2" MDF with small pine blocks to add structure and, like just about everything, is "screwed and glued". The panel facing is 1/4" MDF. This unit will eventually house the autopilot, ADF radio controls, some MFD controls, and some warning displays. It will not go the full depth of the shelf support back toward the "windscreen"..... since at least for a while...... display monitors will have to go there. (I do hope to eventually convert to a projected display.)
Photo #8

In #9 you can see the glareshield sections (it is split in two pieces) screwed in place on the main panel supports. This is held by a combination of gravity and three screws thru small pine blocks that insert into the main panel shelf units.
Photo #9
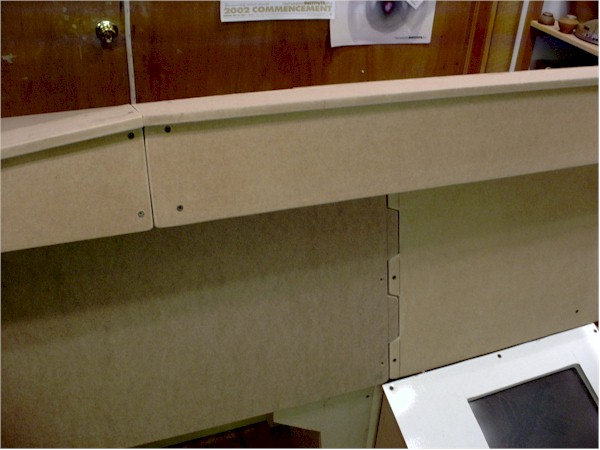
Photo #10 pretty much shows the state of my cockpit project structure as of this time. It is getting a bit exciting now. But I have to contain that excitement......... since there is still a long way to go before I will be flying in it.
Photo #10
I will have to check all the receipts for the materials that I have purchased for this main part of the construction......... but I am pretty positive that at this point it is still under $100 USD in materials. I originally estimated that the entire enclosed cockpit would cost less than $200 USD to construct. (I do have a decent assortment of hand woodworking tools already around the house.)
More to follow as it all develops.
best,
.....................john